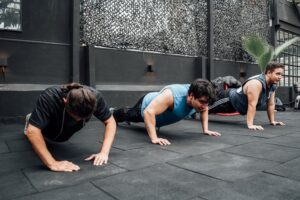
Bodyweight exercises are an amazing way to build strength, improve fitness, and enhance overall health. But if you’ve ever felt like your progress has stalled, you’re not alone. Adding a weighted vest to your routine might be the solution you’ve been looking for. A weighted vest doesn’t just increase the difficulty of bodyweight exercises—it introduces a level of resistance that pushes your muscles to adapt and grow beyond the limits of your own body weight.
Personally I have done bodyweight exercises for the most part of my life and I have always felt like I was not able to push my body to limits with just my bodyweight, and that’s when I decided to purchase a Weighted vest from Decathlon for my bodyweight workouts. and trust me it was a game changer I increased my strength, Endurance and muscle mass very quickly after that.
One common challenge with bodyweight training is that as you get stronger, exercises can start to feel easier, reducing their effectiveness. This is where a weighted vest changes the game. By adding external weight, you increase the intensity of movements like push-ups, pull-ups, and squats—helping you break through plateaus and build strength faster.
I’ve developed a weighted vest training program designed to maximize your results. Whether you’re new to fitness or a seasoned athlete, this guide will help you integrate a weighted vest into your workouts safely and effectively.
In this post, You’ll explore the benefits of weighted vest training, and will provide a detailed program to follow, and share expert tips to help you get the most out of your bodyweight workouts. Let’s dive in.
Table of Contents
What Is a Weighted Vest?
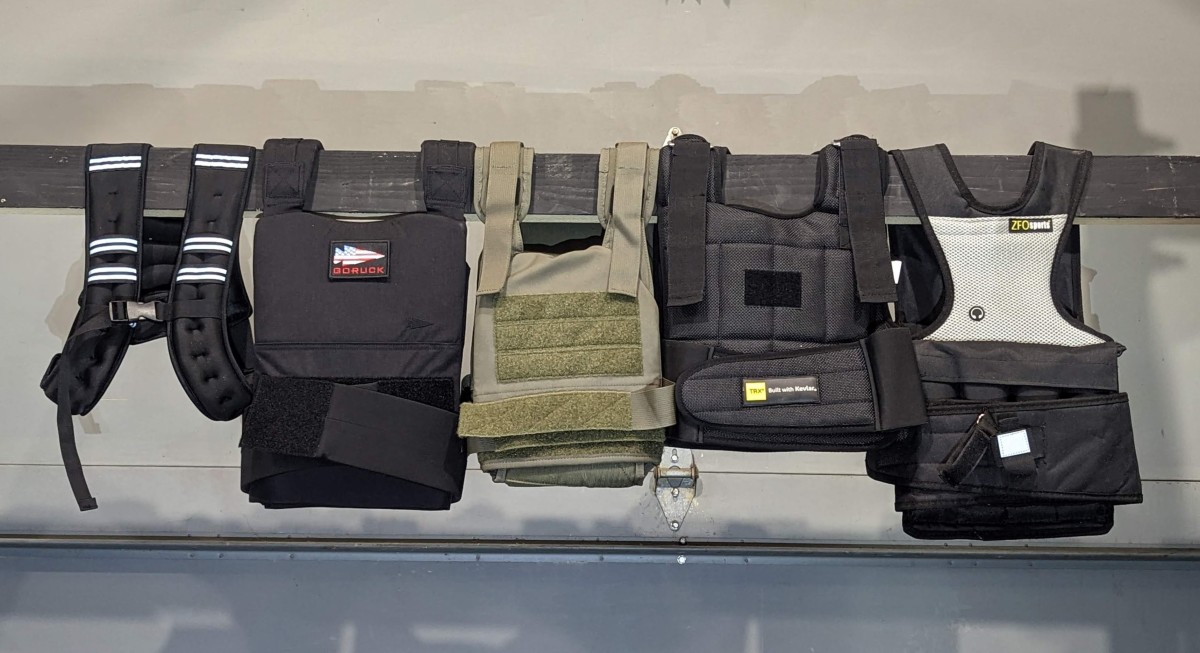
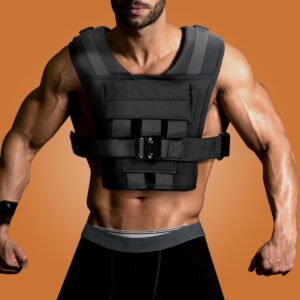
A weighted vest is a versatile piece of fitness equipment designed to add extra resistance to your workouts. It’s essentially a sleeveless jacket with small pockets that hold weights, allowing you to customize the amount of load you carry. These weights are usually made of metal or sand and can be adjusted to suit your fitness level and goals. Weighted vests are designed to fit snugly so you can move freely without the load shifting, making them perfect for bodyweight exercises.
Understanding Weighted Vest Training
Weighted vest training involves performing bodyweight exercises like push-ups, squats, lunges, and pull-ups while wearing a weighted vest. By adding resistance to exercises you already know and love, you make your muscles work harder to complete each movement. This added resistance forces your body to adapt, leading to increased strength, improved endurance, and even greater calorie burn.
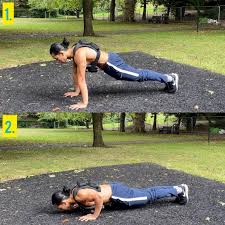
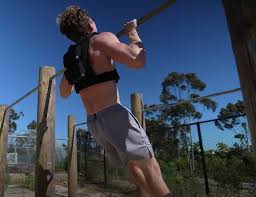
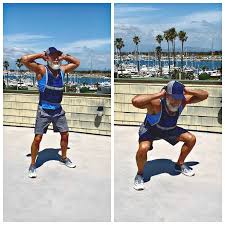
Unlike traditional weightlifting, weighted vest training allows you to keep the natural movement patterns of bodyweight exercises while increasing their intensity. It’s an ideal solution for fitness enthusiasts who want to level up their home workouts without relying on bulky gym equipment.
Why Add Weight to Bodyweight Exercises?
Bodyweight exercises are highly effective, but over time, they can become less challenging as your body adapts. Adding a weighted vest solves this problem by introducing extra load that increases the tension on your muscles. Here’s why you should consider it:
- Break Through Plateaus: When bodyweight exercises feel easy, your progress can stall. A weighted vest helps you push past those limits.
- Build Muscle and Strength: The added resistance forces your muscles to work harder, stimulating growth and strength gains.
- Increase Calorie Burn: Extra weight means your body expends more energy to perform each movement, leading to a higher calorie burn.
- Enhance Endurance: Training with a weighted vest challenges your cardiovascular system, improving your stamina and fitness levels over time.
- Maintain Functional Movement: Unlike machines or heavy weights, a weighted vest allows you to train using natural body movements, keeping your workouts practical and effective.
Whether you’re aiming to get stronger, leaner, or just add some excitement to your workouts, a weighted vest is a game-changer for anyone serious about fitness.
Benefits of Weighted Vest Training
Increased Strength and Muscle Resistance
Adding a weighted vest to your bodyweight exercises increases the resistance your muscles need to overcome. This added load forces your body to work harder, leading to greater muscle activation and faster strength development. Whether you’re performing push-ups, squats, or pull-ups, the extra weight stimulates your muscles to grow and adapt. Over time, this helps you break through plateaus and achieve new levels of strength.
For example:
- Push-ups with a weighted vest target your chest, shoulders, and triceps with increased intensity, mimicking the resistance of a bench press.
- Squats with added weight engage your quads, hamstrings, and glutes more effectively, promoting both strength and muscle endurance.
If your goal is to build muscle and develop real-world functional strength, a weighted vest is an excellent tool to level up your training.
Enhanced Cardiovascular Endurance
Weighted vest training isn’t just for building strength—it’s also a powerful way to improve your cardiovascular fitness. When you add extra weight, your body has to work harder to perform the same movements, which increases your heart rate and oxygen demand. This combination strengthens your heart and lungs, improving your overall endurance.
For example:
- Running, hiking, or even brisk walking with a weighted vest turns a regular cardio session into a more challenging workout.
- Plyometric exercises like jumping squats or burpees with a weighted vest elevate your heart rate and burn more calories in less time.
By incorporating weighted vest training, you’ll notice improvements in your stamina, making other activities like running, cycling, or sports feel easier over time.
Improved Overall Athletic Performance
Whether you’re a beginner or a seasoned athlete, weighted vest training can enhance your overall athletic performance. The combination of strength, endurance, and power gained through these workouts directly translates into better results in sports and daily life.
Here’s how it helps:
- Improved Explosiveness: Exercises like jump squats or box jumps with a weighted vest improve your speed and power, essential for athletic movements.
- Enhanced Balance and Stability: Carrying extra weight challenges your core and stabilizing muscles, improving coordination and body control.
- Greater Speed and Agility: Training with a weighted vest strengthens your legs and cardiovascular system, making you faster and more agile in sports or physical activities.
Athletes in sports like basketball, football, or martial arts often use weighted vests to improve performance. For fitness enthusiasts, this means you’ll not only look fitter but also move better and feel stronger in your everyday activities.
In short, a weighted vest is a simple yet powerful tool that delivers strength, endurance, and athletic gains—all without needing bulky gym equipment.
Getting Started
Choosing the Right Weighted Vest
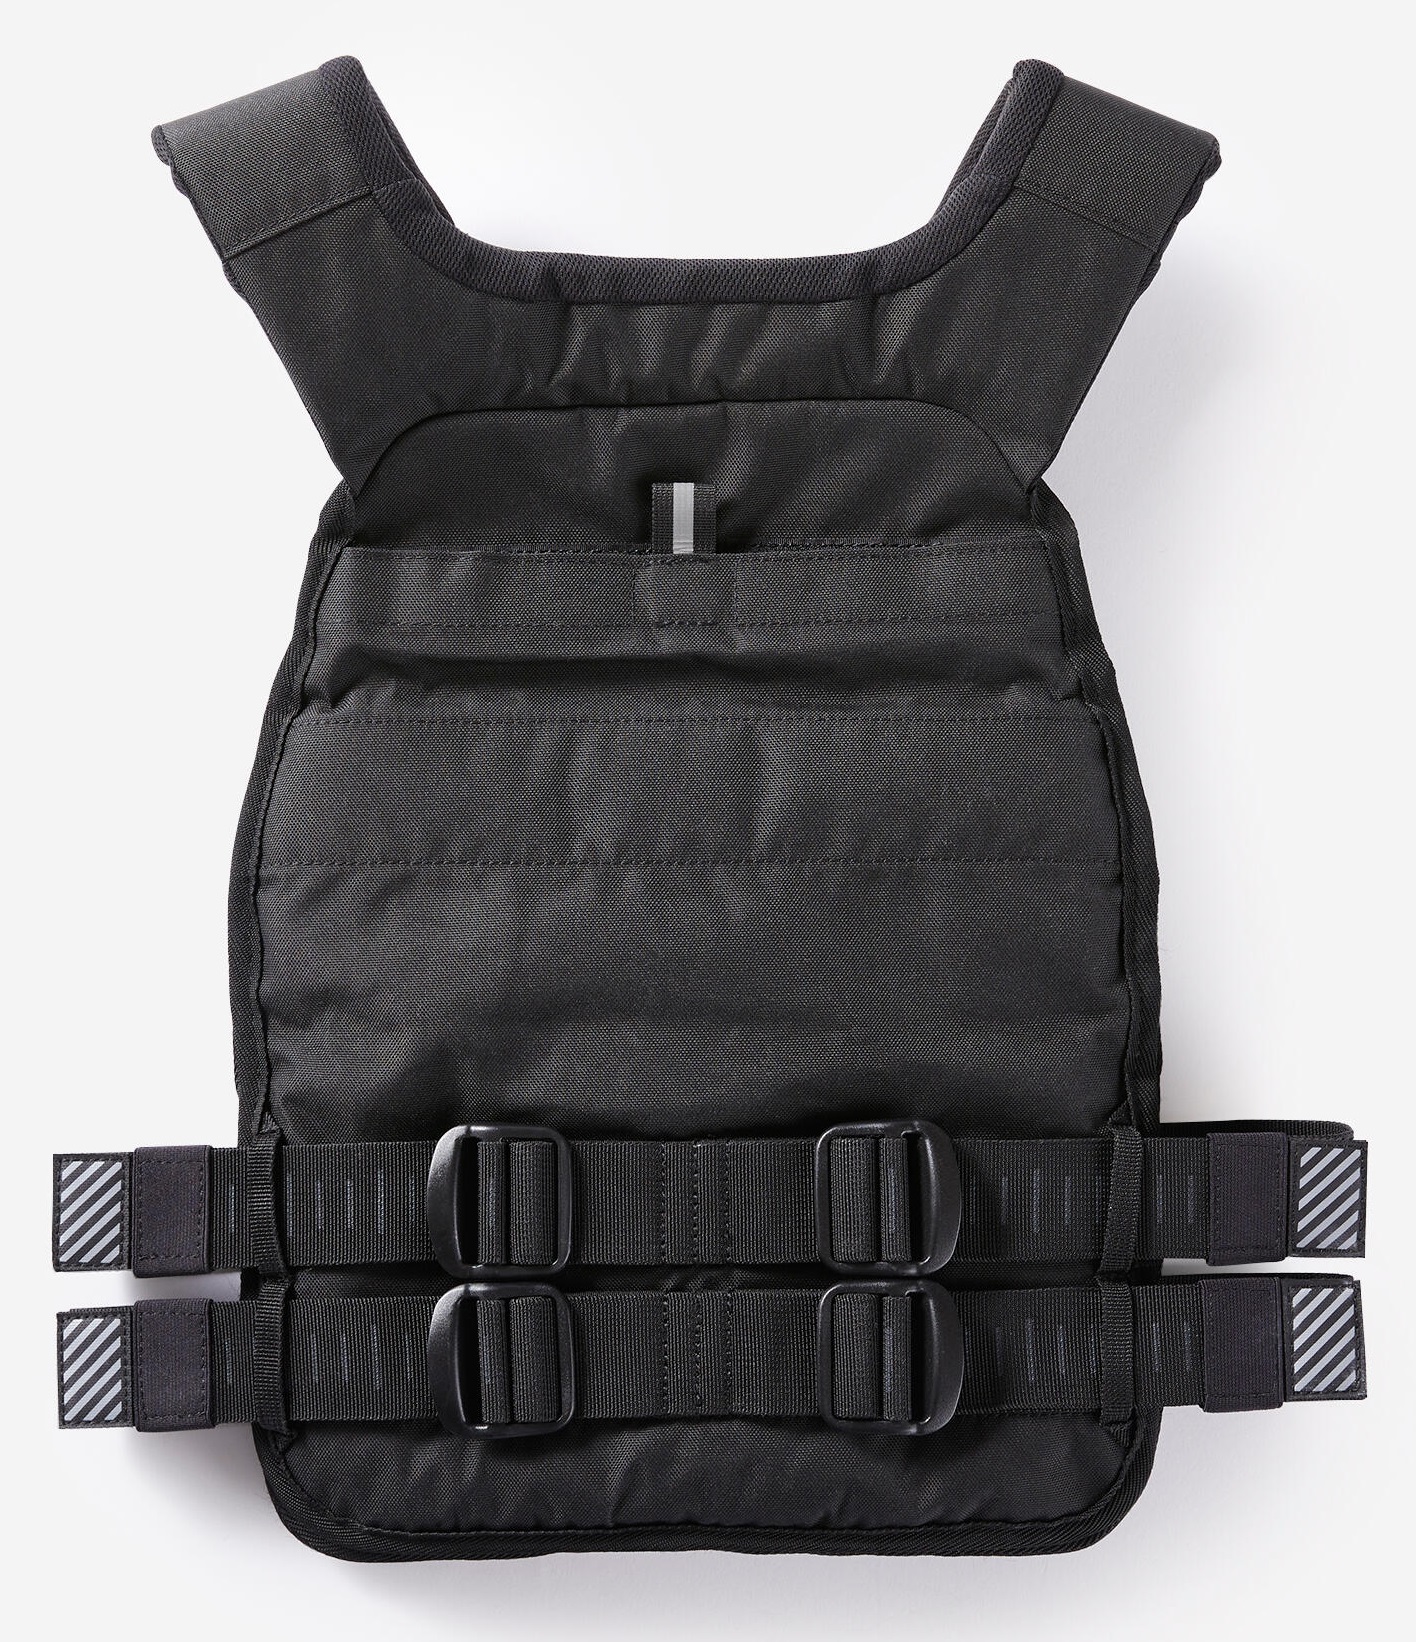
Before diving into weighted vest training, it’s essential to pick the right vest that aligns with your fitness goals and comfort. Here are a few factors to consider when choosing one:
- Weight Range: Start with a vest that allows you to adjust the weight. Beginners can begin with 5–10% of their body weight and gradually increase as they get stronger.
- Type of Weighted Vest:
- Fixed-weight vests: These have a set weight and are best for consistent workouts.
- Adjustable-weight vests: These allow you to add or remove weight, offering versatility as you progress.
- Material and Comfort: Look for a vest made with durable, breathable material to prevent overheating and discomfort during workouts.
- Design and Fit: A snug, ergonomic fit ensures the vest stays secure without bouncing during movement. This is particularly important for exercises like running, jumping, or burpees.
Choosing a high-quality vest makes a huge difference. Investing in the right gear ensures safety, comfort, and better results over time.
Proper Vest Fitting and Sizing
A well-fitted weighted vest ensures you can train effectively without risking injury. Here’s how to get it right:
- Snug but Not Restrictive: The vest should fit tightly enough to stay in place without shifting but not so tight that it restricts breathing or movement.
- Weight Distribution: Ensure the weight is evenly distributed across the front and back. Uneven vests can cause strain on your shoulders, neck, or lower back.
- Adjustability: Many vests come with adjustable straps or buckles. Take time to customize the fit to suit your torso length and shoulder width.
Tip: Test the fit by performing a few squats or jumping jacks. If the vest moves excessively, adjust the straps or try a smaller size. Proper sizing ensures comfort and stability during every workout.
Safety Considerations and Precautions
While weighted vest training is highly effective, using it incorrectly can lead to injuries or strain. Follow these safety guidelines to train smart:
- Start Light: If you’re new to weighted vests, begin with a lighter weight—5% of your body weight is ideal. Gradually increase the load as your body adapts.
- Maintain Proper Form: Adding weight increases the intensity of exercises, so focus on maintaining good form. Poor posture or alignment can lead to injuries, especially during squats, push-ups, or lunges.
- Listen to Your Body: Pay attention to discomfort, strain, or pain, particularly in your joints or lower back. If something feels off, reduce the weight or stop the exercise.
- Avoid Overloading: Adding too much weight too quickly can place unnecessary stress on your spine, knees, and hips. Progress gradually to build strength safely.
- Warm-Up and Cool Down: Always warm up before weighted vest training and cool down afterward. Stretching helps prevent muscle soreness and injury.
By choosing the right vest, ensuring a proper fit, and following safety precautions, you’ll set yourself up for effective and injury-free workouts. Start slow, stay consistent, and watch your progress grow.
Workout Fundamentals
Progressive Overload with Weighted Vests
Progressive overload is the foundation of building strength and endurance, and weighted vests make it easier to apply this principle to bodyweight exercises. The concept is simple—gradually increase the resistance to challenge your muscles and force them to adapt.
Here’s how progressive overload works with a weighted vest:
- Start Light: Begin with a weight that challenges you without compromising your form. For most beginners, 5–10% of body weight is a solid starting point.
- Gradually Increase Weight: Once you can comfortably perform an exercise with proper technique, increase the vest’s weight by small increments—typically 2–5%.
- Add Reps or Sets: If adding weight feels too challenging, focus on increasing the number of reps or sets first before progressing to a heavier load.
Consistency and patience are key. By gradually increasing the resistance, you ensure steady strength gains while avoiding burnout or injury.
Recommended Weight Percentages
To maximize results without overloading your body, here are some general weight percentage guidelines based on fitness levels:
| Fitness Level | Recommended Weight |
|---|---|
| Beginner | 5–10% of body weight |
| Intermediate | 10–15% of body weight |
| Advanced | 15–20% of body weight |
For example, if you weigh 70 kg, a beginner might use a 3.5–7 kg vest. Intermediate trainees can push for 7–10.5 kg, while advanced users can safely go beyond 10.5 kg as long as form is maintained.
Keep in mind that some exercises—like push-ups and pull-ups—require less weight, while lower body moves like squats and lunges can handle heavier loads. Start within your limits and increase weight progressively.
Adapting Bodyweight Exercises for Weighted Training
Weighted vests can transform your regular bodyweight workouts into intense strength-building sessions. Here’s how to adapt popular exercises:
- Push-Ups: Add a vest to increase resistance and challenge your chest, shoulders, and triceps. Start with standard push-ups, then progress to decline or plyometric variations.
- Pull-Ups: Weighted pull-ups are an excellent way to build upper body strength, especially in your back and biceps. Use a vest that doesn’t restrict shoulder movement.
- Squats: Adding a weighted vest intensifies squats by engaging your quads, glutes, and hamstrings more effectively. Progress to jump squats or single-leg squats for a greater challenge.
- Lunges: Weighted vests make lunges a full-body challenge. Start with stationary lunges before advancing to walking or reverse lunges.
- Planks: Adding weight to planks increases core activation. Start with short holds and gradually increase the duration as you adapt.
- Burpees: With a weighted vest, burpees become a total-body cardio and strength workout. Reduce the weight if form or endurance starts to slip.
The key is to maintain proper form and avoid overloading too soon. Focus on quality over quantity—controlled movements with a weighted vest will deliver better results than sloppy reps with heavy resistance.
By following these workout fundamentals—progressive overload, strategic weight selection, and exercise adaptations—you can take your bodyweight training to the next level and see real, measurable progress.
Sample Exercises


Push-Up Variations with Weighted Vest
Push-ups are a staple in bodyweight training, and adding a weighted vest takes them to the next level. The extra resistance forces your chest, shoulders, and triceps to work harder, leading to greater strength gains.
Here are a few progressions you can try:
- Standard Push-Ups: Start with regular push-ups while wearing a light weighted vest. Focus on maintaining proper form—keep your back straight, core engaged, and elbows at about a 45-degree angle.
- Decline Push-Ups: Place your feet on a bench or elevated surface while wearing the vest. This variation shifts more of the workload to your shoulders and upper chest.
- Archer Push-Ups: With the vest on, widen your hands and shift your weight from side to side during each rep. This builds unilateral strength in your chest and arms.
- Plyometric Push-Ups: Explode upward during each push-up, lifting your hands off the ground. The weighted vest adds resistance, increasing power and explosiveness.
Pro Tip: Start with lighter weight, especially for advanced variations, and focus on quality reps rather than speed.
Pull-Up and Chin-Up Progressions
Pull-ups and chin-ups are unbeatable for building back and bicep strength. When you add a weighted vest, you increase the difficulty, accelerating strength and muscle growth.
Here’s how to progress:
- Standard Pull-Ups: Start with regular pull-ups—palms facing away—while wearing a light weighted vest. Keep your movement controlled and avoid swinging.
- Chin-Ups: Switch to palms facing toward you to target your biceps more. The weighted vest makes it even more challenging for your arms and upper back.
- Wide-Grip Pull-Ups: Increase the intensity by widening your hand placement. This focuses more on the lats and shoulders.
- Negative Pull-Ups: If you can’t perform multiple weighted pull-ups, focus on the lowering (eccentric) phase. Jump to the top and slowly lower yourself for 3–5 seconds.
Pro Tip: Start with fewer reps when adding weight and increase the load gradually as your strength improves.
Bodyweight Squats and Lunges
Weighted vests are perfect for lower body exercises like squats and lunges, as they add extra resistance without the need for gym equipment.
- Bodyweight Squats: Perform standard squats while wearing the vest. Keep your chest up, back straight, and knees tracking over your toes. Start with lighter weight and increase over time.
- Jump Squats: Add an explosive element by jumping at the top of each squat. The vest increases the workload on your quads and glutes, building strength and power.
- Lunges: Perform stationary or walking lunges with the vest. This targets your quads, hamstrings, and glutes while improving balance.
- Bulgarian Split Squats: Elevate one foot on a bench or step while wearing the vest. This single-leg exercise isolates each leg for maximum strength gains.
Pro Tip: For squats and lunges, ensure the weight is evenly distributed to maintain balance and avoid straining your knees.
Plyometric Movements
Plyometric exercises combine speed and power, making them ideal for building explosive strength. A weighted vest intensifies these movements, pushing your cardiovascular system and muscles to adapt.
Here are some options:
- Burpees: Adding a weighted vest makes this full-body movement even more challenging. Start slow to maintain form.
- Box Jumps: Jump onto a sturdy box or platform while wearing the vest. Focus on landing softly to protect your knees.
- Jumping Lunges: Alternate legs with each lunge while jumping explosively. The vest increases resistance, making your quads and glutes work harder.
- Mountain Climbers: Perform fast-paced mountain climbers with the vest on. The added weight increases core activation and cardiovascular effort.
Pro Tip: Keep the weight light for plyometric exercises. The focus should be on speed, explosiveness, and maintaining proper form to avoid injury.
By incorporating these sample exercises into your training program, you can target every major muscle group while building strength, endurance, and explosiveness. Start with lighter weights and progress gradually to avoid overloading your body.
Training Strategies
Beginner’s Weighted Vest Workout Plan
If you’re new to weighted vest training, start slow and focus on proper form. Your goal is to build a foundation of strength and endurance while adapting to the added weight.
Weekly Structure:
- Train 3 days a week with at least 1 rest day in between.
- Use a vest that’s 5-10% of your body weight to avoid overloading your muscles and joints.
Here’s a sample beginner workout:
Day 1: Full Body
- Push-Ups: 3 sets of 8-10 reps
- Bodyweight Squats: 3 sets of 12-15 reps
- Plank Holds: 3 sets of 20-30 seconds
- Walking Lunges: 3 sets of 10 reps per leg
Day 2: Upper Body
- Incline Push-Ups: 3 sets of 8-10 reps
- Negative Pull-Ups: 3 sets of 4-6 reps
- Side Plank: 2 sets of 20 seconds per side
Day 3: Lower Body and Core
- Bulgarian Split Squats: 3 sets of 8-10 reps per leg
- Jump Squats: 3 sets of 10-12 reps
- Mountain Climbers: 3 sets of 20 seconds
- Dead Bug: 3 sets of 10 reps per side
Pro Tip: Listen to your body—if you experience fatigue or soreness, reduce the volume or take an extra rest day.
Intermediate and Advanced Training Protocols
Once you’ve mastered the basics, it’s time to step up the intensity with heavier vests and advanced training methods. The focus now shifts to progressive overload, increased endurance, and more complex movements.
Intermediate Training Plan
- Increase the vest weight to 10-15% of your body weight.
- Train 4 days a week with specific muscle group focus.
Sample Split:
- Day 1: Push
- Weighted Push-Ups: 4 sets of 10-12 reps
- Decline Push-Ups: 3 sets of 8-10 reps
- Plank to Push-Up: 3 sets of 12 reps
- Day 2: Pull
- Pull-Ups: 4 sets of 6-8 reps
- Chin-Ups: 3 sets of 8-10 reps
- Supermans: 3 sets of 15 reps
- Day 3: Legs and Core
- Weighted Squats: 4 sets of 12 reps
- Bulgarian Split Squats: 3 sets of 10 reps per leg
- Weighted Plank: 3 sets of 30-40 seconds
- Day 4: Cardio and Plyometrics
- Box Jumps: 4 sets of 8-10 reps
- Burpees: 3 sets of 10-12 reps
- Jumping Lunges: 3 sets of 10 reps per leg
Advanced Protocols
At the advanced level, weighted vests become tools for high-performance training. Focus on heavier weights (up to 20% of your body weight) and explosive movements.
- Plyometric Circuits: Combine jump squats, box jumps, and burpees into a fast-paced circuit for maximum explosiveness.
- Strength Training: Increase reps for pull-ups, weighted push-ups, and single-leg exercises. Add pause reps and slow negatives to boost muscle tension.
- Endurance Challenges: Incorporate weighted running, hill sprints, or stair climbs to improve cardiovascular performance under load.
Pro Tip: At higher intensities, pay close attention to recovery and avoid overtraining.
Recovery and Injury Prevention
Weighted vest training is effective, but it also places extra stress on your muscles and joints. Prioritizing recovery and safety is crucial to avoid injuries and make consistent progress.
Recovery Tips:
- Rest Days: Schedule at least 1-2 rest days per week to allow your muscles to recover.
- Stretching and Mobility Work: Focus on dynamic stretches before workouts and static stretches after training. Pay special attention to your shoulders, hips, and lower back.
- Hydration and Nutrition: Drink plenty of water and consume a protein-rich diet to repair muscles.
Injury Prevention:
- Start with lighter weight and increase gradually—jumping straight into heavy vests can strain your joints.
- Focus on proper form for all exercises to prevent injuries. Poor posture or alignment can cause long-term issues.
- If you feel pain—especially in the knees, shoulders, or back—stop immediately and assess your technique or weight.
Pro Tip: Use foam rolling and recovery tools like massage guns to reduce muscle soreness and improve mobility.
By following these training strategies, you’ll not only maximize your results with a weighted vest but also train safely for long-term progress.
Performance Tracking
Tracking your progress with a weighted vest is essential for staying motivated and achieving results. It helps you measure your strength gains, monitor improvements, and set realistic goals. Here’s how you can do it effectively.
Measuring Strength Gains
Strength gains are one of the key benefits of weighted vest training, but they can be tricky to track without a plan.
- Reps and Sets: Keep a log of how many reps and sets you complete for each exercise while wearing the vest. Over time, you’ll notice that you can perform more reps or sets at the same weight, which signals increased strength.
- Vest Weight: Gradually increasing the weight of your vest is a clear indicator of progress. For example, if you started with 10% of your body weight and now handle 15%, your muscles have grown stronger.
- Time Under Tension (TUT): If you hold a plank longer, complete squats with slower control, or increase pauses during push-ups, you’re building strength.
Pro Tip: Use a journal or a fitness app to track numbers like reps, sets, weight percentage, and duration for each exercise.
Tracking Workout Progression
Progression isn’t just about adding weight—it’s about consistently challenging your body in different ways.
Here are methods to track workout progression:
- Progressive Overload: Increase the difficulty gradually by either:
- Adding more weight to the vest.
- Increasing reps, sets, or duration.
- Reducing rest time between sets.
- Weekly Milestones: Track week-to-week improvements. For example:
- Week 1: 10 push-ups with a 10-lb vest.
- Week 2: 12 push-ups with a 10-lb vest.
- Week 3: 10 push-ups with a 15-lb vest.
- Performance Tests: Revisit a “baseline workout” every 4-6 weeks to measure progress. If you’re completing the same workout faster or with greater ease, you’ve improved.
Pro Tip: Write down your numbers each session—seeing improvements over time is the best motivator.
Setting Realistic Goals
Setting goals gives your training focus, but they need to be achievable and specific. Here’s how to set effective goals with weighted vest training:
- Start Small: If you’re new, aim for short-term goals like completing 10 perfect push-ups with a 5% bodyweight vest.
- Be Specific: Vague goals like “get stronger” don’t work. A better goal is, “Perform 3 sets of 8 pull-ups with a 10-lb vest in 6 weeks.”
- Track Timelines: Break long-term goals into smaller milestones. For example:
- Month 1: Master proper form with a light vest.
- Month 2: Add 5% of body weight for core and lower-body exercises.
- Month 3: Increase to 10% for upper-body moves.
- Balance Challenge and Realism: Progress should challenge you, but it shouldn’t feel impossible. Incremental improvements are key.
Example Goal: “In 3 months, I’ll perform 20 consecutive weighted squats with a vest equal to 15% of my body weight.”
By measuring gains, tracking progression, and setting clear goals, you’ll see steady improvement in strength, endurance, and overall performance. This structure not only keeps you on track but also makes every training session feel purposeful and rewarding.
Common Mistakes to Avoid
While weighted vest training can deliver incredible results, common mistakes can slow progress or lead to injuries. Here’s what to watch out for and how to avoid these pitfalls.
Overloading Too Quickly
One of the biggest mistakes is adding too much weight too soon. While it’s tempting to push your limits, overloading quickly can cause strain on your joints, muscles, and connective tissues.
- Why It’s a Problem: Your body needs time to adapt to the added resistance. Overloading too fast increases the risk of muscle fatigue, joint pain, and injury.
- How to Avoid It: Start with a vest that’s 5-10% of your body weight, depending on your fitness level. Gradually increase the weight by 1-2% per week as your strength and endurance improve. Focus on mastering form before adding more weight.
Tip: If your form starts to break during an exercise, reduce the weight or repetitions immediately.
Improper Form and Technique
Adding weight can exaggerate poor technique, leading to inefficient workouts and potential injuries. This is especially true for movements like squats, push-ups, and lunges, where form is critical.
- Why It’s a Problem: Compromised form puts unnecessary stress on your joints, particularly the knees, back, and shoulders. Instead of strengthening muscles, you risk chronic pain or injuries.
- How to Avoid It:
- Perform each exercise without the vest first to perfect your form.
- Add the weighted vest only when you can complete the movement smoothly and under control.
- Use a mirror or record yourself to ensure proper alignment during training.
Example: If your lower back arches during push-ups or squats, it’s a sign to reduce the weight and focus on core stability.
Neglecting Rest and Recovery
Rest is just as important as the workout itself. Weighted vest training increases the intensity of your sessions, which can lead to overtraining if you don’t give your body time to recover.
- Why It’s a Problem: Skipping rest days can cause fatigue, hinder muscle growth, and increase the risk of injury. Overtraining also reduces performance and motivation over time.
- How to Avoid It:
- Schedule rest days between weighted vest workouts to allow your muscles and joints to recover.
- Prioritize sleep—at least 7-8 hours per night—to repair and grow muscle tissue.
- Incorporate active recovery like walking, stretching, or yoga to improve blood flow and reduce soreness.
Tip: If you feel overly fatigued, scale back the weight or duration of your workouts for a few sessions. Listen to your body.
By avoiding these mistakes—overloading too quickly, improper form, and neglecting recovery—you’ll maximize the benefits of weighted vest training while minimizing risks. Focus on gradual progress, proper technique, and recovery to build strength safely and efficiently.
BONUS: My Personal Weighted Vest Training Protocol
PUSH DAY
| Workout Name | Reps | Rest Period |
|---|---|---|
| Flat Pushups | 20 | 1 Minute Rest |
| Incline Pushups | 30 | 30 seconds Rest |
| Decline Pushups | 20 | 1 Minute Rest |
| Diamond Pushup | 15 | 1 Minute Rest |
Perform the above 4 exercises one after another as many times as possible – The above 4 exercises makes 1 set, perform as many sets as possible – I typically perform 6 to 7 sets every time i perform this routine.
PULL DAY
| Workout Name | Reps | Rest Period |
|---|---|---|
| Wide Grip Pull Ups | 10 | 1 Minute Rest |
| Normal Grip Chin Ups | 10 | 1 Minute Rest |
| Neutral Grip Pull Ups | 10 | 1 Minute Rest |
| Close Grip Chin Ups | 10 | 1 Minute Rest |
Perform the above 4 exercises one after another as many times as possible – The above 4 exercises Makes 1 set, perform as many sets as possible – I typically perform 6 to 7 sets every time i perform this routine.
LEG DAY
| Workout Name | Reps | Rest Period |
|---|---|---|
| Squats | 30 | 1 Minute Rest |
| Hamstring Forward Bend | 30 | 1 Minute Rest |
| Calf Raises | 30 | 1 Minute Rest |
| Bulgarian Split Squats | 15 Both Sides | 1 Minute Rest After Performing on Both Legs |
| Explosive Jump Squats | 10 | 1 Minute Rest |
Perform the above 5 exercises one after another as many times as possible – The above 5 exercises Makes 1 set, perform as many sets as possible – I typically perform 5 to 6 sets every time i perform this routine.
Conclusion
Integrating Weighted Vest Training into Your Fitness Routine
Incorporating weighted vest training into your workouts is a simple yet powerful way to elevate bodyweight exercises. Whether you’re just starting or an advanced athlete, adding a weighted vest to your routine allows you to progressively challenge your muscles, enhance endurance, and take your fitness to the next level.
Start slow—focus on choosing the right vest, mastering form, and following a structured progression plan. Gradually introduce the vest to exercises like push-ups, pull-ups, squats, and plyometric movements to build strength, endurance, and overall performance.
Make weighted vest training part of your weekly routine by incorporating it into 2-3 workout sessions. Alternate with bodyweight-only days to avoid overtraining and ensure proper recovery.
Long-Term Benefits and Potential Transformations
The long-term benefits of weighted vest training go far beyond short-term gains. Over time, you’ll notice:
- Increased Strength and Muscle Growth: The added resistance pushes your muscles to work harder, leading to visible improvements in strength and muscle tone.
- Improved Cardiovascular Fitness: Your endurance and stamina will increase as your body adapts to the extra load.
- Better Athletic Performance: Whether it’s running faster, jumping higher, or mastering advanced movements, weighted vest training will enhance your overall capabilities.
- Enhanced Aesthetics: By combining weighted training with proper nutrition, you’ll build a leaner, more defined physique that boosts your confidence.
With consistency and the right approach, weighted vest training can transform your fitness journey. It’s a practical, cost-effective tool to challenge your limits, break through plateaus, and see real results without a gym. Start today and unlock your potential—one rep at a time.


